Indoor and low-light photography
Last update: 04/19/2024
Our blog continues to grow thanks to you, our readers. This post may contain affiliate links, which means we can earn a small commission if you make a purchase through them, at no extra cost to you. This helps us to continue to bring you more and support our work!
Low-light situations are common, more than you might think. Our eyes adapt and take advantage of each light source to allow us to see as much as possible as in broad daylight, so that when you’re in a relatively bright room or it’s not yet too dark outside, you don’t fully realize how much lower the ambient light is. This will quickly bring your camera to its limits because it needs light. This is the very definition of photography, writing with light, if there is less of it, it will inevitably be harder to write it, a bit like trying to write a letter with a pen in which there is hardly any ink left. So today we will be talking about low-light and indoor photography. By the way, on a relatively close subject, you might want to know more about night photography?
We will therefore encounter this kind of problem very often, in interior architecture such as in a church or a museum, in a concert, in landscape photography very early or very late, in indoor sports such as basketball or boxing, in street photography in the evening, in wildlife, in macro… basically all the moments and places where you cannot rely on good natural light and where you cannot control the light yourself. This is why studio photography is a special case because, although it is usually done indoors, the photographer will have lighting at his disposal that he will have chosen and adjusted. Real estate photography to showcase properties for sale is another example.
You’ll find that shooting, capturing and taking pictures indoors or in low-light conditions is not that simple. Let’s take a look at the difficulties when shooting, the possible solutions for taking pictures in these conditions and finally what photo equipment I recommend for this type of situation.
Difficulties of shooting in low light conditions
I suggest you read the other articles related to exposure in photography, they will help you better understand how your camera captures light and why the situations we are discussing here are problematic. Because depending on the domain, although it is always a lack of light, the best solutions will not always be the same whether you are shooting static or moving subjects, whether you can add light or not, whether you have a tripod or a stable surface available or whether you are handheld…
It will therefore be necessary to collect light or add more when possible, this will most often require buying the right equipment. First, thanks to the aperture of your lens: the more it can open wide, the more light it will be able to transmit. Between us, if you are in a totally dark room without any light source, don’t dream, even a very bright lens doesn’t work magic. However, opening it wider will reduce the depth of field and in some domains, this will not be the desired goal. So you won’t want to open as much as your lens allows, even though, with short focal lengths and distant subjects, large apertures still maintain a fairly wide depth of field.
In this case you should rather focus on lengthening the exposure time. By lengthening this, you will let your sensor collect the light longer and therefore increase its quantity, even if it seems very weak. But here again, in some cases such as indoor sports, using a long exposure time causes blurring often unwanted, so you will be forced to use shorter exposure times which will further reduce the amount of light collected.
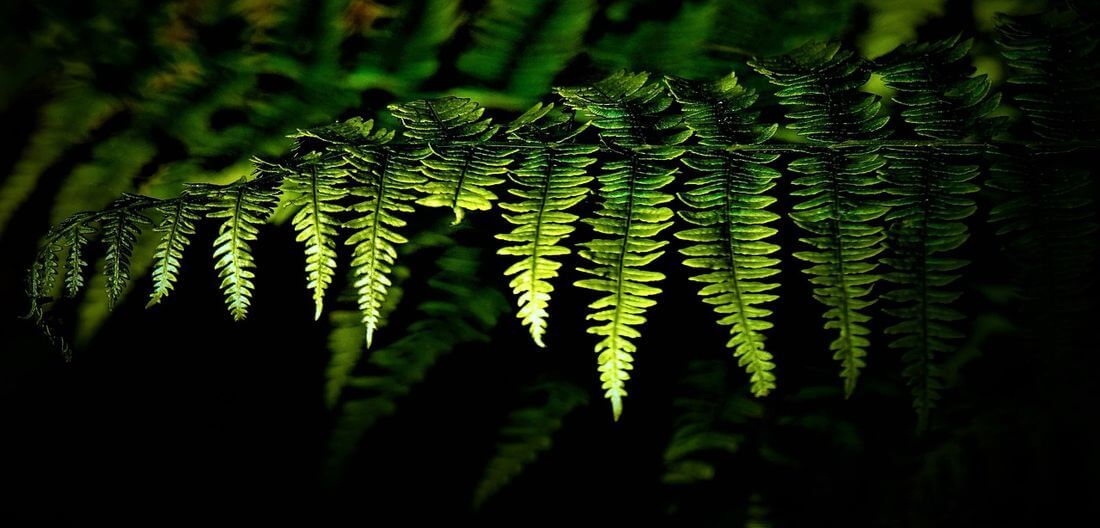

Your sensor has a sensitivity to light called ISO. In low light, being able to increase this sensitivity will ensure you recover the light lost due to an aperture that is too small and/or an exposure time that is too short, or because you have reached the maximum aperture of your lens and cannot extend the exposure time. By increasing the sensitivity, you will be able to get a good exposure for your image. However, this increase in ISO is followed by a deterioration in image quality, especially with the appearance of digital noise.
Finally, even if in some cases none of these solutions are enough to regain enough light, you can add some with accessories such as a flash or if certain limitations are reached hand-held you can use a stabilizer, whether it is a mechanical stabilizer integrated in your lens or sensor, or with a tripod which is obviously the best stabilizer there is. But sometimes, these accessories will not be effective, accessible or will be prohibited altogether.
Solutions for indoor/low-light photography
Static pictures
In landscape and architecture photography (static subjects), you won’t need a very short exposure time. With a 24mm wide-angle lens, this time can be adjusted up to 1/25th of a second (1x the focal length to avoid motion blur). With the ” focal length conversion ” on a sensor smaller than the full frame, this exposure time will remain correct. A 16mm APS-C and a 12mm mFT can be used up to 1/25th of a second. For this type of picture, it is best to avoid increasing the ISO, ideally below 400 ISO, to keep the maximum dynamics and colors and limit the appearance of noise. Yet you will realize that even with a relatively long time, you will often lack light.
You will also prefer to use a small aperture, such as f/5.6 or f/8, to maximize the depth of field and have the whole image sharp, which will not help our problem of lack of light. You’re therefore going to have to keep playing with the exposure time, for example by using a tripod, which will allow us to set the exposure time as we see fit. If we can’t do otherwise than handheld, we’ll try to use a lens with stabilization that will allow us to extend the shutter speed by several stops. In the example of the 24mm, we can often go up to 1/5th or even 1/4 of a second, sometimes up to 1s for the most effective stabilizations provided that you remain as stable as possible.
The camera may also fail to focus automatically because autofocus works best when it receives a lot of light. Since there is less light here, it may “slip” or even be totally wrong. Because the subjects are static and the depth of field is large (especially with short focal lengths), you’ll be able to turn off Autofocus and focus manually (which can save you many times).

Shooting moving subjects indoors
I am talking here for example of portraits in concert, sports or wildlife in the undergrowth, we will generally have to reduce the exposure time from 1/125th to 1/1000th or even less. With long focal lengths such as 300mm, you should even avoid using an exposure time longer than 1/320th, unless the lens is stabilized. That’s why this type of image often ends up quite noisy with a lot of background blur (bokeh). Indeed, to compensate for the lack of light and the very short exposure time, you will have to play on the two other parameters, i.e. the aperture and the ISO sensitivity. Preferably use the aperture, which allows you to isolate the subject in addition to capturing more light. We will try to keep the ISO sensitivity as low as possible to limit noise and keep a better image quality. We will therefore prefer large apertures, such as f/2.8 or f/1.4, which implies having bright lenses, although from 300mm, it will be difficult to find better than f/4 and especially to have access to it without having to sell a kidney!
When it’s allowed and as long as the subject is not too far away, a flash can be quite useful as well as reflectors which will help you to direct the light. For posed portraits where you would even be in a studio situation, you can add lighting such as softboxes. For distant subjects, you will often have to raise the ISO sensitivity and accept that noise will disturb your images, a sensitivity of 3200 or 6400ISO is still acceptable in most cases and with most cameras from mFT to full frame, these can even allow 12800ISO without too much hassle. For focusing, if the subject(s) are not too agitated and remain in the same area, you can switch to manual focus. If they are more active and manual focusing would be too critical, you’ll need to find bright areas with contrast in the closest places where you want it to be sharp.


In some other areas, you will have to combine solutions, such as street photography at night. Indeed, you will be able to take photos of architecture without paying attention to passers-by and at another time take portrait photos to illustrate city life. So you might as well walk around with a tripod at the same time as a wide aperture stabilized lens and have to juggle mainly with ISO and exposure time settings.
Macro photography can also become a “low light” situation because even if there is light, moving subjects and sometimes static subjects will require a fairly short exposure time. The extremely short depth of field will cause you to close the diaphragm (Ex f/11) and the noise will quickly become annoying. You will then avoid raising the ISO, which is the best way to quickly run out of light, especially since you will be very close to your subject. In some cases, you and your camera may cast a shadow on the subject. Using a tripod there is also a very useful tool, but for many subjects, adding light via a ring flash would be necessary. For your information, a conventional flash will have its flash obstructed by the lens hood and even the lens, hence the interest of having this flash placed in front of the lens.
Ideal settings for indoor and low-light photography
Here’s what I recommend:
- Mode: A/Av for static subjects (aperture priority), S/Tv (shutter speed priority) for moving subjects but you will often need to have control over all the settings so it will be wise to learn how to control and switch to manual mode (M),
- Auto Focus: AF-S for static subjects, AF-C for moving subjects, Manual if really not enough light for AF to catch the subject,
- Aperture: small (f/5.6-8) for wide scenes (landscapes), large (f/1.4-2.8) for single subjects and highlighting them from the background,
- Exposure time/shutter speed: long (up to several seconds) for static subjects, short (1/125th to 1/4000th and less) for moving subjects,
- ISO: as low as possible but for active subjects it will be necessary to go up, very high if necessary (to avoid motion blur).


A little reminder, on your DSLR/mirrorless camera, you have the option to shoot in RAW or JPEG format. The RAW format offers more flexibility in post-processing. You will certainly have to use a post-production/editing software like Photoshop or Lightroom to be able to retrieve your RAW and process it, but it’s a nice thing to do I think. You’ll be able to recover more easily underexposed pictures (too dark), reduce the noise, recover a failed white balance, etc. Even if the essential will be done during the shooting, don’t forget it…
The right equipment for low light and indoor photography
I’m mainly talking about the bodies and lenses. It is of course impossible to give you all the references, because it depends too much on your use, your means or the situations in which you find yourself.
Camera body: you will need a camera that is comfortable in low light, both on raising the ISO and focusing. So, from mFT to full frame, and if you have the budget for a fairly high range, because entry-level autofocus is often less efficient, especially if you don’t have wide-aperture lenses, it will have to be compensated by a more sensitive AF. For static subjects, opt for cameras with sensor stabilization, such as most recent Panasonic, Sony and Olympus cameras.
Lenses: All of these cover a fairly wide focal range, from wide-angle for landscape and architecture to telephoto for wildlife, small telephoto for macro, and standard focal length for street photography. Choose stabilized lenses for areas where you’ll be using small apertures and long exposure times, such as most 16-35mm f/4 lenses, as well as telephoto lenses, such as 70-200mm f/4, and wide-aperture lenses for areas where you need to reduce exposure time, such as 24-70mm f/2.8 or 18-35mm f/1.8 (APS-C). Fixed focal lengths are less versatile, but allow generally larger apertures, such as 24mm f/1.4 or 85mm f/1.8. You will need good practice and a good knowledge of your needs as you will be limited to a single field of view.
The more you go up in focal lengths, the harder it will be to find large apertures, especially at affordable prices. If you are interested in telephoto lenses that can reach up to 600mm, you will often have to settle for relatively small and slippery apertures such as a 150-600mm f/5-6.3. All in all, up to 200mm, you can find affordable lenses with an aperture of at least f/4. Here are a few references in the order of the types of photos indicated in the article:
- Wide-angle / Ultra wide-angle lens
- Tamron 15-30mm f/2.8 G2 VC (FF)
- 16-35mm f/4 stabilized by Nikon, Canon or Sony
- Fuji 10-24mm f/4 OIS (APS-C)
- Tamron 10-24mm f/3.5-4.5 VC (DSLR APS-C)
- Olympus 7-14mm f/2.8 PRO (mFT)
- Panasonic Leica 8-18mm f/2.8-4 (mFT)
- Standard Focal Length / Transtandards
- Nikon 24-85mm f/3.5-4.5G VR and Nikon 24-120mm f/4G VR (DSLR FF)
- Canon 24-70mm f/4L IS and 24-105mm f/4L IS II (DSLR FF)
- Sony 24-70mm f/4 OSS and 24-105mm f/4 OSS (Mirrorless FF)
- Tamron 24-70mm f/2.8 G2 (DSLR FF)
- Fuji 16-80mm f/4 OIS and Fuji 18-55mm f/2.8-4 OIS (Mirrorless APS-C)
- Panasonic 12-35 f/2.8 OIS and Leica 12-60 f/2.8-4 (mFT)
- Olympus 12-40 f/2.8 PRO and 12-100 f/4 IS PRO (mFT)
- Telephoto lenses
- Tamron 70-200mm f/2.8 G2 VC (DSLR FF)
- Tamron 70-210mm f/4 VC (DSLR FF)
- 70-200 f/4 stabilized by Nikon, Canon or Sony (FF DSLR)
- Fuji 50-140 f/2.8 OIS (Mirorrless APS-C)
- Olympus 40-150mm f/2.8 (mFT)
- Panasonic 35-100mm f/2.8 OIS (mFT)
- Super telephoto lens
- Sigma 150-600mm f/5-6.3 OS contemporary (DSLR FF)
- Tamron 100-400mm f/4.5-6.3 VC (DSLR FF)
- Sony 100-400 f/4.5-5.6 OSS (Mirrorless)
- Fuji 55-200mm f/3.5-4.8 OIS (Hybrid APS-C)
- Panasonic 100-300mm f/4-5.6 (mFT)
- Olympus 75-300mm f/4.8-6.7 (mFT)
Regarding macro lenses, I could particularly recommend the Tamron 90mm f/2.8 VC (DSLR), the Sigma 105mm f/2.8 OS macro (DSLR), the Fuji 80mm f/2.8 OIS macro (APS-C mirrorless), the Tamron 60mm f/2 (APS-C DSLR) or the MFT mirrorless, the Panasonic Leica 45mm f/2.8 OIS macro or the Olympus 60mm f/2.8 macro.
Accessories for indoor and low light photography
For static subjects:
Tripod: Do not forget the budget for the tripod, a good stable one will cost at least a hundred euros. It must be able to support the weight of your equipment, so pay attention to the description of the tripod, in general the maximum weight is indicated, look at the weight of your equipment and multiply it by 2 to find out which maximum weight will be the most suitable for your tripod while keeping some margin if you later switch to heavier equipment. Manfrotto and Vanguard tripods are generally of good quality.
For moving subjects:
Flash : When the subjects are close enough and you can use it, a flash will be a valuable ally to add light and capture the action. Choose a good cobra flash, because the one built into your camera, if it has one, is often low-powered and too close to the lens. For macro photography, use a ring flash that surrounds the front of the lens to avoid cast shadows. Brands such as Meike and Neewer offer very interesting cobra flashes at affordable prices, in ring flash I recommend the Aputure brand.
I hope this article has “enlightened” you, which comes in handy when you lack light, haha! Remember, I can’t shoot for you, and one article (yes, even this one) is not enough to master all areas in low light. You’ll need to practice, test, learn and understand all the principles of photography to finally take better pictures in these situations as in others. I can assure you, with a bit of photographic practice and control of your camera, you don’t have to be a professional photographer to get by! Who would have thought that learning photography would be simple, huh?! In the meantime, I can teach you how to create a nice background blur or bokeh?
See you soon and happy shooting.

Written by Sylvain PONS
I've been passionate about photography since 2010, learning as I went along. Today, I dedicate myself to guiding others in their choice of camera gear and sharing a variety of tips to improve their photography skills.
Despite our care, a mistake may have slipped into this article. If you find any, please don't hesitate to let us know so we can correct it as soon as possible and keep our information up-to-date!
