My best tips for wildlife photography
Last update: 06/22/2026
Our blog continues to grow thanks to you, our readers. This post may contain affiliate links, which means we can earn a small commission if you make a purchase through them, at no extra cost to you. This helps us to continue to bring you more and support our work!
I have to admit that, even though it is not a field I practise every day, I have always been fascinated by nature and wildlife photography. What photographer has never dreamed of capturing beautiful images of wild animals, like the ones we see in National Geographic wildlife magazines? I am just an amateur with a real passion for wildlife photography, but every time I have had the chance to try it in a natural environment, I have loved the experience and kept wonderful memories from it. I am thinking in particular of discovering the wilderness during my safari in Tanzania, photographing orangutans in the jungle in Sumatra, Indonesia, or shooting makis and other birds when I lived on the island of Mayotte, in the Indian Ocean.
After guiding you through the choice of a lens for wildlife photography, as well as the right camera and accessories, I wanted today to share my practical advice for getting better results in the field. Owning a telephoto lens and looking at galleries from the best wildlife photographers can be inspiring, but it will not instantly make you the king of wildlife photography! If you are just starting out, I invite you to have a look at my articles explaining the basics of photography. You will find the essential notions you need to get started and understand the basics and all the associated technical notions.


Which animal should you photograph, and how can you spot it?
Wildlife photography can be either very demanding or surprisingly accessible, depending on the animals you are interested in. Of course, photographing a cat on the sofa is easier than capturing a buzzard diving on its prey. Yet in both cases, we are still talking about animal photography, with different requirements and, naturally, different equipment. Some small animals may require macro lenses, or at least a lens with a short minimum focusing distance, while others will require short focal lengths or, on the contrary, very long ones. So don’t start with overly complicated subjects too quickly. Begin instead with easier animals, such as pets, which often require no special technique but can help you become familiar with animal reactions and train yourself to be discreet.
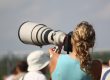
Of course, when we think of wildlife photography, what immediately comes to mind is wild animals, wandering through nature in search of that unique shot few people could capture, often with huge professional cameras that cost a fortune. Fortunately, that kind of gear is not essential, especially today, when you can find very decent equipment at far more reasonable prices, as you will see in my article on wildlife photography equipment. By the way, I also invite you to read our article detailing our best tips to use a telephoto lens. What really makes the difference is preparation, and I am not only talking about placing your camera on a tripod and adjusting a few settings. You need to learn about the animals themselves: their behaviour, where to find them, how to spot them, and how they move through their environment. That is only the beginning, because you will also need time to master approach techniques such as stalking and hide photography. That is why it is better to start by choosing one type of animal in particular, the one that interests you most, whether mammals, birds or insects. Try not to spread yourself too thin, because there is a huge amount of information to absorb about every type of animal. As you can imagine, you do not prepare for and photograph a bear, an owl, a lion or a hare in the same way.
There are also many environmental constraints. Obviously, you will not necessarily find the animals you are interested in around every corner, and you will often have to travel to places where you may need to wait for hours, with weather and light that keep changing. That means preparing each outing carefully, including tracking phases where you will spend more time observing and planning than actually taking pictures.


Preparing the shoot
You can start by choosing the species you want to photograph and finding out where it lives. Logically, if you are looking for deer in the village square, you may be disappointed. You then need to learn as much as possible about its behaviour: whether it is diurnal or nocturnal, what it eats, whether it lives alone or in groups, whether it migrates, its habits, and anything else that will help you find it more easily. Do not forget to learn how to spot signs of its presence, such as footprints, remains of meals, droppings, hair, shelters and so on. It is also important to be able to identify it properly. Some species are easy to recognize, but others look very similar and can be confused. Well, you probably won’t mistake a tiger for an elephant, we agree, haha. You can find all this information in specialized books or online.
Once you know where the animals are, you will need to find a viewpoint and observe. A pair of binoculars is never a bad idea. The goal is to understand where they pass, where they rest, where they look for food, and so on. You can also take notes about places, times and possible photo opportunities, especially if you are trying to follow several species at the same time. Remember to think about wind direction when choosing your observation point, because most animals have a very developed sense of smell and may be scared away by your scent. You can also use accessories such as hides, mentioned in the article on equipment, or wear camouflage clothing, for example. We agree that for your pets in the garden, that will not be necessary, right? Don’t hesitate to return regularly to the same places to add new observations to your notebook.

Here I am talking about hide photography, a technique that consists of disturbing animals as little as possible in their daily life. In theory, a good hide will often allow you to get close enough to the animals, provided you have prepared your outing properly and made the right observations beforehand. Sometimes, however, you will need to build a hide and give the animals time to get used to it. This is a technique where patience is essential, because you will spend a lot of time setting things up and observing.
Another technique is the approach, or photo walk, which consists of going directly in search of the animal. Basically, instead of waiting for them to come to you, you go and look for them. This technique requires a lot of skill, because it also depends on preparation, observation and discretion. You will need to move quietly while carrying heavy equipment, and disappointments are often numerous when you do not yet know how to do it well.
Time to press the shutter!
Once you have made these observations, defined where you will stand and understood when the animals you are interested in are likely to appear, you still need to aim your viewfinder, choose the times and places where the light will be best, and orient your camera in the most suitable direction.
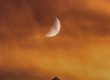
In general, the first and last hours of the day offer beautiful low-angle light. Whenever possible, prioritize the lit areas where the animals usually pass. Don’t hesitate to do a few “blank” tests before the animals arrive, so you can refine your framing and assess the different possible compositions. This may mean moving slightly, lowering your point of view or shooting from a higher angle if the background is unattractive. Since most animals move quickly and are difficult to anticipate, you will sometimes have to adapt and follow them even if the harmony of the composition is not perfect. In that case, remember that with long focal lengths and relatively large sensors, even Micro 4/3, the depth of field is quite shallow and backgrounds will often be blurred. You therefore need to make sure the animal is properly placed in the frame.
To start with, I invite you to reread the article about the rule of thirds, but remember that even though it is called a “rule”, it is only a convention. It helps you create visual balance quite easily, but above all it encourages you to think about your composition all the time, even when you choose not to follow it. Unless you want to create a particular effect, I would advise you to apply the same kind of principles as in portrait photography. Aim for the eye, leave space in front of your subject, ideally in the direction of its movement. If it is moving to the right, leave room on the right side of the image, and do the same to the left, top or bottom when needed. Also orient your camera according to the animal’s shape and posture to give the image better movement. For example, a standing giraffe will often suit a vertical frame better than a fox lying down.


Unlike architectural photography, you will rarely have buildings, roads or other constructions providing obvious geometric references. Even so, you can still find and use leading lines in the environment, whether they come from trees, branches, ground relief or other natural elements. In short, use the surroundings to guide the viewer’s eye towards the animal; it can only strengthen your image. To go further, I also invite you to reread the article on composition in photography. It may be useful!

Camera settings and modes
For most animals, you will usually need to control shutter speed more than depth of field. This is especially true with long focal lengths, where depth of field is already very shallow. It is therefore often best to use S/Tv mode, or shutter speed priority, and let the camera decide the aperture. In many cases, it will end up using the widest aperture anyway, which is often what you would have chosen yourself when the light is low or when a very fast shutter speed is needed. As for ISO sensitivity, the camera can also handle it automatically, unless you want full consistency across a series of shots. In that case, you can switch to manual mode and set everything yourself, and the other articles on this website can help you with that.
For metering mode, everything will depend on the framing and on how much space the animal occupies in the image. You can refer to the article on metering modes to learn more, but by default, center-weighted metering is often a good compromise. If the subject is small or backlit, you can switch to spot metering. Be careful, though: on Canon DSLRs, spot metering is linked to the central AF point, so you will need to center it.
For autofocus mode, you will obviously need a mode that can follow the animal’s movement, such as continuous autofocus (AI Servo on Canon). For relatively slow animals, you can limit this to a single AF point and follow the subject yourself. For more restless subjects, however, it is often better to use tracking over a larger or smaller group of AF points. A wider area may reduce responsiveness, but it also reduces the risk of losing the subject. It is up to you to find the best compromise depending on the animal and its movements.
When it comes to burst mode, high-end cameras often offer greater comfort and have an advantage over others. In wildlife photography, moments can be extremely fleeting, so a good burst rate can be very useful. Spending hours observing an animal and missing the right moment because the camera reacts too slowly, either in burst shooting or autofocus, is always frustrating. Be careful not to overdo it, though. The noise from some cameras may eventually alert animals, not to mention the fact that you will quickly fill your memory card!


Exposure settings
Shutter speed is often the most important setting. Depending on your equipment, the animal and the way you want to convey movement, your shutter speed may vary from 1/10th to 1/8000th of a second. It will also depend on the focal length of your lens, whether it is stabilized or not, and whether you are using a monopod or a tripod. On full frame, the usual “rule” recommends a shutter speed of 1/focal length (1/300th for a 300mm lens, for example) when shooting handheld, without stabilization on the lens or camera. On APS-C, you will need to multiply the focal length by at least 1.5, or even 2 for extra safety (around 1/500th for a 300mm lens, using the same example). On Micro 4/3, multiply it by 2 or even 3 (around 1/1000th for a 300mm lens). Obviously, if stabilization is available, as on most Micro 4/3 cameras or recent Sony cameras, you can use slower shutter speeds. Overall, though, it is the animal and its movements that will define the shutter speed you need. Being able to shoot without camera shake at 1/10th of a second is not very useful if the animal itself cannot stay still.


As mentioned above, with long focal lengths, aperture may seem less important. In reality, it still matters, but you will often want your lens to open as wide as possible to bring in more light and avoid raising the ISO too much. Remember, a lens that opens to f/2.8 allows you to photograph an animal twice as fast as a lens with a maximum aperture of f/4. With a wider aperture, you will also be able to blur your background more easily and create smoother bokeh. In situations where light is not lacking, or if there are several animals in the frame, you can always use smaller apertures such as f/5.6 or f/8 to increase depth of field a little or improve detail in the image. Some telephoto lenses, especially zooms, are also often weaker at their widest apertures.
ISO sensitivity always raises the same issue. Ideally, we would like to keep it at its lowest value, but light conditions rarely allow that. This is particularly true when you need to use fast shutter speeds, especially since this kind of photography rarely allows you to use a flash, let alone install lighting systems! You will need to accept the ISO required to maintain the shutter speed you want, so don’t be too demanding on that point. Fortunately, modern cameras handle higher ISO values fairly well, and you can often go up to ISO 3200 on most formats, and even higher on larger sensors. I have personally photographed animals in Tanzania, and in the jungle in Sumatra, at ISO 6400 without too much trouble.
As you can see, wildlife photography is a demanding field, like many other areas of photography. Few genres, however, are quite as demanding, especially when it comes to camera equipment. If you want satisfying results, you need to prepare your shots carefully, invest a lot of time and be patient, because there will always be a lot of missed shots. Personally, I have got into the habit of shooting in RAW and doing my post-processing afterwards.
That’s the end of this article. I hope these tips will help you “capture” our little creatures more successfully. Don’t forget to have a look at the other articles on this site, especially the one about wildlife equipment and the one where I share advice for taking pictures on safari.

Written by Sylvain PONS
I've been passionate about photography since 2010, learning as I went along. Today, I dedicate myself to guiding others in their choice of camera gear and sharing a variety of tips to improve their photography skills.
Despite our care, a mistake may have slipped into this article. If you find any, please don't hesitate to let us know so we can correct it as soon as possible and keep our information up-to-date!