What is ISO in photography?
Last update: 06/22/2026
Our blog continues to grow thanks to you, our readers. This post may contain affiliate links, which means we can earn a small commission if you make a purchase through them, at no extra cost to you. This helps us to continue to bring you more and support our work!
If you are a beginner who wants to learn photography and improve your pictures, I think it is essential to understand the main technical terms and how they work. This article follows on from one of the most important pieces for understanding the basics of photography: exposure in photography. ISO sensitivity is one of the three parameters of the exposure triangle, along with shutter speed and aperture.
In my opinion, it is the easiest of the three to understand. I still remember when I first started photography and searched for “photo ISO” or “camera ISO” on Google, trying to understand what those three letters meant and how they could affect my pictures.
In this article, which is once again a little technical, I’ll first explain what ISO is in photography and how it works. I’ll then show you how to adjust and change this setting. After that, we’ll look at how ISO sensitivity affects your photos and how to choose the right value. Finally, I’ll end with practical examples of ISO use in photography, depending on the scene, along with a few notes about camera equipment. Don’t worry: you don’t need to be a professional photographer to understand the idea. Here we go.
")


Definition and basics of ISO sensitivity
I told you this was the easiest parameter of the exposure triangle to understand. So, what is ISO in photography? Put simply, it is often described as the “sensitivity of your camera’s sensor to light”. In practical terms, ISO is a setting that helps determine how bright your photo will be for a given exposure. Back in the film days, it referred to the sensitivity of the film. So what does ISO stand for? It comes from the International Organization for Standardization, and in photography it refers to the standard used to measure this sensitivity.
Unlike the other two parameters of the exposure triangle, ISO is measured on a simple, easy-to-understand scale. Below are the standard ISO values generally found on cameras.
ISO 50 – 100 – 200 – 400 – 800 – 1 600 – 3 200 – 6 400 – 12 800 – 25 600 – 51 200 – 102 400
Remember, as explained in the article on exposure, when you double one exposure parameter, you double the amount of light. In practical terms, if you go from ISO 100 to ISO 200, the image becomes one stop brighter. Keep in mind that the higher the ISO number, the more sensitive the camera becomes to light. You might be wondering what that actually means. I’ll explain it in more detail below, but the general idea is this:
- If your scene is dark, you will need to make your camera more sensitive to light, so you increase the ISO,
- Conversely, if your scene is very bright, you do not need to increase the camera’s sensitivity because the available light is already sufficient. You can then keep the ISO at its lowest setting.


The principle behind ISO is therefore very simple in itself, but there is one drawback: the appearance of “digital noise” when high ISO values are used. I won’t go into the technical details of how noise appears here, but keep in mind that it is a kind of grain or speckling that appears in your photos, especially in dark or flat areas, and it can make the image look less clean. I’ll explain the relationship between ISO sensitivity and camera equipment near the end of the article.
The difficulty with ISO sensitivity is this: choosing the lowest ISO possible to avoid grain in your photos, while still adapting to the scene in front of you. I can already hear you thinking, “Why not just use a low ISO all the time, so I never get noise?” The problem is that depending on the shooting conditions, using a low ISO, such as ISO 100, may be impossible because your shutter speed will be too slow to get a sharp photo. I’ll go into detail in the paragraphs below, but remember this:
ISO should generally be used as a last resort once the other light-gathering parameters have reached their limits: maximum aperture and the slowest shutter speed you can safely use.
How to adjust and change ISO
Now that we know the basics and what ISO is used for in photography, let’s look at how to change or set ISO sensitivity. I’m not going to make things more complicated than they really are. It is very simple. There are two main cases:
- You use an “Auto ISO” mode, which is available in several camera modes, such as aperture priority, shutter priority or automatic mode. In this case, you choose one main setting and the camera adjusts the ISO automatically,
- Or, and this is the case that interests us most here, you set your ISO manually, either in manual mode or in a semi-automatic mode such as Av or Tv on Canon cameras. Usually, on DSLR and mirrorless cameras, there is an ISO button on the top of the body that lets you increase or decrease the ISO value.
The setting itself is no more complicated than that.

The influence of ISO sensitivity: noise
Once the basics are clear and the ISO settings understood, let’s look at the effect of ISO sensitivity. As mentioned above, the goal is usually to limit noise in your photos as much as possible, unless you deliberately want it for creative reasons. In other words, avoid pushing ISO to the maximum when you don’t need to. Noise will not always be visible when viewing a photo full-screen on a computer. Look at the photos below, taken at ISO 400, ISO 5000 and ISO 20,000. Do you see a real difference?
Note that I deliberately used extreme values for this example, because the Canon 6D handles high ISO so well that if I had chosen ISO 100, ISO 400 and ISO 3200, you really would not have seen much difference.


Noise becomes visible as soon as you zoom in to look at the details. Now look at the same two photos at 100% magnification, with ISO 400 on the left and ISO 20,000 on the right. This is closer to what you would notice if you printed the photo very large.
As you can see, noise appears more clearly in the darker areas of the photo. The more I increase the ISO, the more this unattractive noise becomes visible.


I admit the alignment between the two photos is not perfect, but you can clearly see the noise appearing, right?
How to determine the maximum ISO sensitivity to use?
There is no miracle formula, but keep the following principles in mind:
- Stay at the lowest ISO value for as long as you can, usually ISO 100 or ISO 50 on some cameras, to avoid noise as much as possible,
- When the light drops, you will have no choice but to increase ISO so your camera can keep enough light for a usable exposure. If you don’t, most of your photos will probably be blurry, unless you are using a tripod,
- The three parameters of the exposure triangle, ISO, shutter speed and aperture, are linked. Before increasing ISO, you therefore have two other ways to let more light into your camera,
- Doubling or halving ISO lets you double or halve the brightness of the image. In practical terms, it allows you to adjust one of the other two settings, aperture or shutter speed. If you double the ISO and leave the other two settings unchanged, the photo will become too bright, or overexposed.
So, to avoid increasing ISO when you need more light, you have two possibilities. In both cases below, changing ISO or changing one of these parameters has the same effect on exposure, but it does not produce the same visual result. You can:
- Open your aperture by one stop, for example from f/14 to f/11,
- Slow your shutter speed by one stop, for example from 1/100 to 1/50.
In both examples, the amount of light reaching the sensor is doubled. To compensate for this extra light, you or the camera will then have to adjust another parameter.
Example no. 1: f/11 1/30 ISO 100 -> f/8 1/60 ISO 100
(the shutter speed has been doubled)
Example no. 2: f/5.6 1/100 ISO 200 -> f/8 1/50 ISO 200
(the aperture has been reduced by one stop)
1) Open your aperture
This adjustment will reduce your depth of field. Remember, as explained in the article about aperture, the wider your aperture is, meaning the smaller the f-number, the shallower your depth of field will be. In other words, less of the scene will be sharp from front to back. If you use this technique to avoid increasing ISO, this is the main limitation you will face: a reduced depth of field. Depending on the photo you want to take, this can become very limiting. I’ll explain a concrete example below.
2) Shoot with a slower shutter speed
The same principle applies to the second possibility. If you decide to use a slower shutter speed to let in more light, you will quickly reach the point where you need a tripod to avoid a blurry photo. Below a certain shutter speed, it will no longer be possible to get sharp handheld pictures. To avoid lengthening the exposure time, you can increase the ISO instead.
In both cases, the general idea is to use higher ISO values only when needed: either to avoid a shutter speed that is too slow and would create blur, or to avoid reducing your depth of field too much. You will need to find a compromise between opening the aperture by one stop, slowing the shutter speed by one stop, and increasing ISO.
To keep a useful shutter speed reference in mind, you can base it on the focal length you are using. It is not a universal rule, because it also depends on sensor size and stabilization, but it is a reference point every photographer knows:
Try to keep your shutter speed at least equal to the focal length you are using.
Example
1/20 for a 20mm focal length
1/100 for a 100mm focal length
1/300 for a 300mm focal length
and so on
I hope this part was clear, because it is ultimately the most important part of the article. If you understood that, you understood everything. I still want to give you a few concrete examples of ISO use and ISO choice, from the most common to the most complex. This section is not essential, but I think it will help you understand things better.
Some concrete examples

Landscape photography in full sun
This is the simplest ISO situation and the easiest to remember. As mentioned above, you should always try to limit noise. In full sun, you do not have to worry about a lack of light. Start by setting your aperture between f/11 and f/14 for your landscape. Then simply set ISO to the lowest value available on your camera, often ISO 100 or ISO 50, as on my 6D. You won’t have to worry about blurry photos because, in this situation, the shutter speed will usually be more than fast enough to keep the image sharp.
To go further and understand ISO sensitivity better, you can try doubling the ISO in this situation. If you are in Av mode, aperture priority, which is an easy mode to start with, your camera will halve the exposure time to compensate for the extra brightness created by doubling ISO. For example: you had f/11, ISO 100, 1/500. You now get f/11, ISO 200, 1/1000. Your photo is exposed in the same way and the result is identical, especially since ISO 200 does not create visible noise.

If you double the ISO again, to ISO 400, the shutter speed will double to 1/2000. If you double it again, to ISO 800, you get 1/4000. At that point, many cameras will reach their limit, because 1/4000 is very often the maximum shutter speed available. This is a good way to understand the relationship between ISO and shutter speed. You can also see that in the middle of the day, for sunny landscape photography, you will never really have noise problems in your pictures, even at ISO 800. So there is nothing to worry about. Just remember to keep ISO as low as possible.
Midday photo with a wide aperture
Now let’s take a less common case: shooting in the middle of the day with a wide aperture. The general idea is to blur the background and highlight a subject. This blur, and its quality, is called bokeh. This could apply to outdoor portraits, or to highlighting a detail in a landscape or an object in the sun.
In terms of ISO sensitivity, this is still a simple case. You have plenty of light, so you stay at the lowest ISO value your camera allows. I wanted to include this example mainly to show you the relationship between ISO and the two other parameters.

If you want to blur the background, you might use a wide aperture, for example f/2.8. You set ISO to the lowest value and let the camera choose the appropriate shutter speed. Example: f/4, ISO 100, 1/2000. If you double the ISO for the exercise, the camera will double the shutter speed to 1/4000. You have probably already reached the shutter speed limit of your camera body. If you then want even more background blur and decide to switch to f/2.8, the camera may no longer be able to compensate with a faster shutter speed because it is already at its maximum. You are therefore stuck with an overexposed photo. There are ways around this, such as using an ND filter, but I won’t go into that here.
This also shows the importance of your camera body and the way it handles ISO sensitivity. If the camera were able to go down to ISO 50, you could have switched to f/2.8, because the camera would then have been able to adjust the shutter speed to 1/4000.
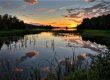
Sunrise or sunset landscape photography
Let’s take a common example for landscape photographers. They often look for the best light, either at sunset or sunrise, during the famous golden hours. You will generally want a large depth of field, around f/11 to f/14. You arrive at a location at the end of the day, set your aperture to f/16, and the camera gives you a shutter speed of 1/10s, which is almost impossible to use handheld, especially if you do not have a tripod.
To take the photo handheld, you have two solutions, knowing that either option can help you gain one stop of shutter speed:
- Open your aperture, meaning use a larger aperture and therefore a smaller f-number, for example from f/16 to f/11,
- Double your ISO so you can double your shutter speed.
This is the situation I mentioned above. It clearly shows the relationship between ISO, aperture and depth of field.
You might decide to open your aperture by several stops, for example down to f/5.6. In this case, you will gain shutter speed, but your scene will no longer be sharp from front to back. And that was not what you wanted at the beginning. So this is the moment to ask yourself whether increasing ISO might be the better choice instead of opening the aperture too much.

The trick is to find the right balance. You may decide to open only one stop, from f/16 to f/11, which allows you to double the shutter speed. But is that enough? Not necessarily. In that case, you can also double the ISO at the same time.
You will therefore have to play with these settings, because opening the aperture by one stop or doubling ISO will lead to the same exposure result: you can double your shutter speed and get a sharper photo. However, increasing ISO will eventually introduce noise. This depends mainly on how well your camera body handles higher ISO values, which we’ll discuss at the end of the article. Opening the aperture, on the other hand, will reduce your depth of field.
So here is your dilemma: less depth of field, or more noise?
Of course, the problem disappears once you have a tripod, because you can use a very slow shutter speed with a remote shutter release or the self-timer. This also shows how important ISO performance is on your camera body, because otherwise your photo will either be blurry or you will need a tripod in these conditions.
Cloudy or overcast daytime photography
This is a situation you will often encounter in everyday life or while traveling. Here, everything depends on what you want to photograph. Do you want to shoot a landscape? A portrait? Wildlife or plants? Do you want to highlight one specific subject?
You get the idea: depending on your intention, you will usually first choose an aperture suited to the scene and to the look you want.
If you want to highlight a subject and choose a wide aperture, you will generally not have any major ISO problem. At f/2.8, the shutter speed is usually still fast enough to get a sharp picture in this kind of situation. Of course, it also depends on the focal length you are using.

If the weather is cloudy and you want a large depth of field, for example for landscape photography, you will probably have to increase ISO. If you use f/11 and the light is low, the shutter speed chosen by the camera may not be fast enough. As a reminder, keep in mind the rule mentioned above: shutter speed should roughly match the focal length of your lens.
The longer your focal length, the more you will have to increase ISO, because the minimum shutter speed needed to avoid blur will be higher. To put it another way, if you are shooting landscapes with a 14mm focal length, you can theoretically go as low as around 1/10s before the photo becomes blurry. Conversely, if you are using a 300mm focal length and photographing birds, a minimum shutter speed of around 1/300 may be required to avoid blur.
On cloudy days, reaching a shutter speed of 1/300 will almost always require an increase in ISO. Which brings us to the last example below.
Wildlife photography: ISO sensitivity and focal length
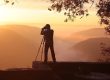
Last concrete example. I’m talking about wildlife photography here, and in particular two personal examples: safari photography in Tanzania and wildlife photography in the undergrowth of the jungle in Sumatra, with orangutans. These two examples show the importance of ISO in photography and its relationship with focal length.
Remember this: the longer your focal length, the higher the ISO you may need. Why? Because you need a fast enough shutter speed to avoid a blurry photo, and depending on the shooting conditions, such as full sun, cloud cover or shade, that may simply be impossible without increasing ISO.
Example 1: safari photography in Tanzania
Even though the light was decent in the middle of the day, mostly sunny and sometimes cloudy, I was shooting with my Canon 70-300mm L IS. In theory, I had 1/300 as a minimum reference shutter speed. That is the minimum, and it can be fine for landscape-style savannah photos or when the animals are still.
But as soon as you photograph animals that are moving or running, 1/300s becomes too slow and the photos turn out blurry. To explain it simply, I usually wanted to isolate my subjects, so I chose the widest aperture available at 300mm, which was f/5.6. In the middle of the day, with this aperture and ISO set to the lowest value, I sometimes ended up with shutter speeds of 1/200 or 1/300. I was very often too limited if I stayed at base ISO. If the sky became slightly overcast, the shutter speed dropped even lower.
What can you do in this case? You have no choice but to increase ISO so you can double your shutter speed. As a result, most of my safari photos were taken between ISO 400 and ISO 800, which still does not generate any visible noise. The more the light dropped at the end of the day, the more I had to increase ISO. At night or at sunrise, I sometimes shot at ISO 1600, 3200 or even 6400 to get the right shutter speed.

All of this was mainly due to the shooting conditions, but also, and above all, to the focal length I was using, 300mm, and its maximum aperture of f/5.6. Once again, you can see the importance of camera equipment and its relationship with ISO sensitivity. Obviously, I would not have needed to increase ISO that much if:
- My lens had had a larger maximum aperture, such as f/4 or f/2.8. Remember that at f/4, you let in twice as much light as at f/5.6,
- I had used a shorter focal length, which would have required a slower shutter speed. For example, for landscape photography with my 24mm, I could use slower shutter speeds and therefore would not necessarily need to increase ISO.
Which brings me to my second example.
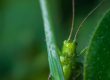
Example 2: photographing monkeys in the undergrowth
I’ll end with this example. We have just seen the importance of focal length and maximum aperture in relation to ISO. A few years ago, I was in the jungle in Indonesia, photographing orangutans. For context, I had the same lens, 300mm with a maximum aperture of f/5.6, but not the same camera body. I was using my old 500D at the time.
The situation was as follows: very low light, a need to use a long focal length because the monkeys were far away, and a lens limited to a maximum aperture of f/5.6.

Conclusion? I opened my aperture fully, f/5.6 at 300mm. I had a very slow shutter speed. I increased ISO to the maximum, ISO 1600, but that still left me with a shutter speed that was too limited, very often below 1/300. So what was the problem? I was stuck. I had reached the limits of my equipment: both my lens, with its limited maximum aperture, and my camera body, with its poor high-ISO performance.
Now imagine the following to see if you are beginning to understand. If I had had a maximum aperture of f/4 instead of f/5.6, what would that have changed? Remember: that would have let in twice as much light. Since the settings are linked, I would have been able to shoot twice as fast at f/4 as at f/5.6. Now imagine that I could have gone up to ISO 3200 instead of ISO 1600. The effect would have been the same, and I could have used an even faster shutter speed.
Do you see how important camera equipment can be in photography?
Practical ISO use in photography: a summary
A quick section to summarize. Unfortunately, there is no magic formula, and it is impossible to say that you should always use a specific ISO in a specific situation. It depends on four main elements:
- The shooting conditions, such as sun, night photography, clouds, etc.,
- The maximum aperture of your lens,
- The ISO performance of your camera body, and especially its noise management. ISO 1600 on my 500D was really borderline in terms of noise, and the quality was poor. Going up to ISO 1600 on my 6D is something I can do without thinking, because the body manages noise very well. The difference between the two, you ask? One is an APS-C body, the other is full frame, and there is a €1,500 price difference…
- The focal length you use, because the longer the focal length, the faster the shutter speed you need, and therefore the more likely you are to need higher ISO.

Example of a long focal length that often requires increasing ISO to avoid motion blur or camera shake, here a 150-600mm lens – More details on Amazon
When to use low ISO?
Low ISO sensitivity usually means values between around ISO 50 and ISO 400. You can use it on a sunny day, or even on a slightly cloudy day. In good light, you should use the lowest ISO possible.
In most cases, with a short focal length, less than 100mm for example, low ISO will be enough to get a sharp photo, especially in landscape photography. As soon as you use a long focal length for a specific purpose, such as birds or planes in the sky, you will often have to increase ISO.
When to use high ISO?
Let’s consider high ISO as starting around ISO 400 or ISO 800. You get the idea: you will use higher ISO values as soon as one of the following situations applies:
- You have already opened your aperture as much as possible,
- You have already slowed your shutter speed as much as possible and you do not have a tripod to use a longer exposure,
- You are in a low-light situation that requires you to increase ISO to avoid blurry photos, such as night photography, concerts, etc., and you still don’t have a tripod!
- You want to create a specific effect in your photos, such as an old-school grainy look, although this can now be done very well in post-processing,
- You are using a long focal length and the conditions are not ideal, for example my orangutans,
- You are limited by one of the other two exposure parameters: a deliberately small aperture or a high shutter speed requirement, for example, all in low or very low light.

Limitation related to aperture: I already mentioned this above. You absolutely want to keep a small aperture, such as f/14, for landscape photography in low light and you do not have a tripod. You have no choice but to increase ISO to get a fast enough shutter speed and avoid camera shake.
Shutter speed limitation: For example, you want to photograph planes in the sky, flying birds, or animals moving in low light. The problem is the same: if you need to maintain a fast shutter speed, for example 1/2000, you will have no choice but to increase ISO.
Example for isolating a flying bird with a 600mm lens:
- f/2.8 ISO 100 1/500 (not fast enough),
- f/2.8 ISO 200 1/1000 (borderline if the subject is moving fast),
- f/2.8 ISO 400 1/2000,
- f/2.8 ISO 800 1/4000.
As you can see, if you want to use a fast shutter speed while keeping a wide aperture, increasing ISO is necessary to compensate for the lack of light reaching the sensor, which is directly linked to the fast shutter speed.
Camera equipment, shooting and ISO sensitivity
Well, I know this article is very long, so congratulations if you have made it this far! I’ll end with a very important point about camera equipment and its connection with ISO sensitivity in photography. You’ll understand why equipment matters so much when it comes to ISO.
Some key points to remember:
About your camera body
- The high-ISO performance of your camera is very important because it allows you to shoot in low light without being stuck, as I was with my 500D in the orangutan example. In general, the better your camera handles high ISO, the cleaner your images will be. A typical example is full frame, 24x36mm, which often offers ISO values above 100,000,
- Minimum ISO on your camera body: this can also be useful, especially if you can go down to ISO 50 instead of ISO 100. This is particularly interesting for those who want to use wide apertures, such as f/1.4, in full sunlight. ISO 50 lets you use a slower effective sensitivity and be less limited by the camera’s maximum shutter speed, often 1/4000,
- The cost of your camera body: in most cases, a more expensive body will manage higher ISO better and therefore produce less noise. Full-frame cameras, compared with APS-C or MFT cameras, generally handle high ISO much better. As a general rule, the more expensive the camera is, the more it offers high ISO values, even if in practice you will never shoot at ISO 100,000.
Which camera is right for your use? That is another debate, which I have already partly covered in the article explaining how to choose a camera for travel.

The 6D Mark II, a modern full-frame camera that handles high ISO very well – More details on Amazon
About your lenses
- The maximum aperture of your lens: as a reminder, the wider the maximum aperture of your lens, meaning the smaller the f-number, the less you may need to increase ISO. Doubling ISO or opening the aperture by one stop has the same effect on exposure. If you have a very “bright” lens, you won’t need to increase ISO as quickly because more light is already entering through the lens. This is one reason why the price difference between an f/4 lens and an f/2.8 lens can be so significant,
- The cost of your lens: the previous point naturally leads to this one. A bright lens is usually expensive, especially at long focal lengths. However, there are very good value bright lenses, such as the Canon 50mm f/1.4 or the Canon 85mm f/1.8. Keep in mind that bright telephoto lenses, especially f/2.8 models, are expensive,
- The focal length of your lens: I mentioned this earlier in the article. The longer the focal length you use, for example 300mm or 600mm, the faster the shutter speed you need to avoid blurry photos. And a fast shutter speed often means good high-ISO performance, especially in low light, dark areas, undergrowth, sunset, sunrise, etc. If you only shoot with a 14mm lens, ISO performance matters less because you do not need such a fast shutter speed. At 500mm for wildlife photography in the undergrowth, it is another story.


About your photography practice
- Don’t hesitate to increase ISO: modern cameras handle ISO sensitivity better and better, so you should not be afraid to push your camera a little when needed. It is better to double or triple ISO than to end up with a blurry photo, right?
- What type of photography do you shoot? Depending on your practice, you will need strong ISO performance more or less often. If you mainly shoot landscapes in the middle of the day, it will matter less. It can become useful for undergrowth photography, and even more so in low light. If you also use long focal lengths, good ISO performance becomes much more important,
- Finally, start thinking about the benefits of shooting in RAW rather than JPEG. RAW is the equivalent of an unprocessed digital negative, whereas the JPEG file that comes out of your camera has already been processed by the camera. You therefore have less flexibility to recover colors and details in dark or overexposed areas. Setting the right ISO value also gives you more room to recover details in shadows or burnt-out highlights.
Conclusion
Although I must admit this article is very long, I really hope it helps you understand the concept of ISO sensitivity. If anything is still unclear, please let me know in the comments. Want to know more about ISO sensitivity and old film speed scales?
In the meantime, I invite you to read my article on aperture, one of the two other parameters of the famous exposure triangle.
See you soon for the final article on shutter speed.
I wish you happy learning and beautiful photos!

Written by Sylvain PONS
I've been passionate about photography since 2010, learning as I went along. Today, I dedicate myself to guiding others in their choice of camera gear and sharing a variety of tips to improve their photography skills.
Despite our care, a mistake may have slipped into this article. If you find any, please don't hesitate to let us know so we can correct it as soon as possible and keep our information up-to-date!