Tripods in photography: how to choose one? A complete guide
Last update: 06/23/2026
Our blog continues to grow thanks to you, our readers. This post may contain affiliate links, which means we can earn a small commission if you make a purchase through them, at no extra cost to you. This helps us to continue to bring you more and support our work!
If you’re new to photography and have just bought your first camera and lens, chances are a tripod is already on your list of future expenses. It can take a little time, and a bit of progress in photography, to understand why a tripod can become so useful in everyday practice.
When you start photography, you already spend a lot of time trying to understand your camera’s first settings. Like you, I went through the same process: reading the user manual, searching Google for strange terms such as ISO sensitivity, depth of field, hyperfocal distance, and so on. As you progress, the first thing you usually think about is changing lenses, either because you want to improve in a specific field or because you have reached the limits of your current gear.
Then comes the often expensive moment when you start buying accessories. And what do you usually think about? Most of the time: camera lens filters and a tripod. That’s the point of this article: to quickly explain what a tripod is used for in photography, and why it becomes essential in certain situations. Above all, I hope I can help you understand how to choose a tripod, and I’ll share a few recommendations for future purchases at the end of the article.
I will deliberately not talk about tripods for smartphones or small compact cameras, as they do not require the same level of features. However, if you’re wondering which tripod to choose for a DSLR or mirrorless camera, you’ve come to the right place! I personally started with a Gorillapod, a small, versatile, foldable, and flexible tripod that is perfect for slightly unusual shots. Load capacity depends on the model, but it can work very well with a small DSLR or compact camera, especially if you only want to take selfies from time to time. It even has a small bubble level! This ultra-compact tripod fits easily into a backpack and can be unfolded in seconds.
While you’re thinking about buying a tripod, I also suggest taking a look at our full article summarizing everything you need to know about choosing your camera bag.

Benefits of using a tripod
To begin with, I wanted to quickly explain why you might use a tripod, and in which fields it becomes almost indispensable.
From a purely technical point of view, using a tripod allows you to:
- Get better stability: it may sound obvious, but that is the main reason. A tripod keeps your camera and lens stable on the ground, so you don’t have to worry as much about motion blur,
- Shoot at slower shutter speeds: this is especially useful when you no longer need to worry as much about the shutter speed you are using. In some cases, you may simply not have enough light, in the morning or evening, for example, even after pushing your camera settings as far as possible: high ISO, wide aperture, and so on. Despite that, the shutter speed may still be too slow for handheld shooting. In that situation, the tripod becomes a real lifesaver. This is very often what happens during the famous golden hours, shortly before and after sunrise or sunset,


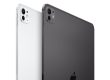
Two examples of tripods: the choice is huge and not always easy…
- Improve your framing and composition: using a tripod can definitely improve the quality of your photos. Why? Think about it for a second: you have to set up the tripod, choose the exact location, adjust the height, refine the shooting angle, and so on. All of this forces you to think about your image before taking it, instead of shooting quickly and thinking, “this should look pretty good.” In the end, photos taken with a tripod are usually more composed, more thoughtful, and better framed, simply because you take the time. You’ll take fewer photos, but better ones,
- Frame from unusual angles: a tripod also allows you to place your camera in positions that would otherwise require acrobatic skills! A typical example is shooting close to the ground to exaggerate perspective, as in architectural photography,
- Improve image sharpness: there’s a good reason why even sports photographers use a tripod or monopod. It is a great way to minimize camera shake. An image shot on a tripod will almost always be sharper.
In some situations, depending on your camera gear, you may be able to work without a tripod for a while. However, here are the fields where a tripod is almost indispensable:
- Night photography: stabilizing your camera with a tripod will make your life much easier,
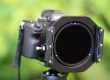
- Long exposure: essential for photographing waterfalls or the sea with an ND filter.


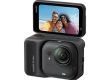
Example of a situation where a tripod is required: night photography on the left, long exposure on the right
- Stars,
- Light painting,
- Time lapse: good stability is essential,
- Fireworks,

- Panoramic views,
- HDR: you need to be very stable to capture the exact same frame several times,
- Selfies, because it’s trendy and it’s nice to be in the picture from time to time, isn’t it?
In other situations, or for other types of photography, it will also be very helpful:
- Whenever the light is low, in the morning or evening, to avoid camera shake,
- Macro photography, where it is easier to focus to the millimeter when nothing moves,
- Wildlife or sports photography: have you ever tried holding 3 kg of photo gear at arm’s length for several hours?


How to choose a tripod?
Now that I’ve hopefully convinced you of the usefulness of a tripod, let’s get to what really matters: how do you choose one, and which criteria should you consider? I’ll go through all the key points below.
Maximum load
This is by far the most important thing to consider when buying a tripod. It is simply the maximum weight your tripod can support. You absolutely need a tripod suited to your heaviest setup, and stable enough in all conditions, even the trickiest ones: wind, seaside, uneven ground, and so on.
To estimate the maximum load you need, you simply need to know the maximum weight of your complete setup: camera body + lens. Many people recommend choosing a tripod with a maximum load at least twice the weight of your gear. If your setup weighs 2 kg, a tripod rated for at least 4 kg is recommended. In general, the higher the maximum load, the heavier and therefore more stable the tripod. If you don’t have to carry it for hours, that should be fine. We’ll come back to this point later.
Maximum height
This is the second important point when choosing a tripod. There are two maximum heights to consider: with and without the center column raised. There is no perfect height, but it is usually recommended that the tripod reaches roughly your shoulder. You then add the height of the tripod head and camera, which is around 20 cm. Also keep in mind that your eyes are about 10 cm higher than your shoulders.
A tripod with the center column lowered and a maximum height of about 1.50 m will work well for someone around 1.75 m tall, for example. Don’t include the center column too much in your calculations, as it becomes much more sensitive to wind once extended. Personally, I only raise it when it is really necessary.
Keep in mind that it’s better to have a slightly taller tripod, which you can always adjust by lowering the legs a little, than to choose a tripod that ends up being too short. Obviously, the higher the maximum working height, the more expensive the tripod tends to be.


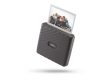
Example of a tripod folded on the left and unfolded on the right
Folded size and number of sections
This is one of the most important criteria for hikers and backpackers who practice photography: the compactness of the beast. How much space does my tripod take up lengthwise? The folded height is closely linked to the number of sections the tripod has, or, put simply, into how many parts each leg folds. Each section slides into another. The more sections you have, the shorter the tripod will be when folded, but generally the less stable it will be. It’s all about finding the right compromise, but as a general rule, a maximum of three sections is often recommended. So take a close look at the tripod’s size once folded.

Minimum height
This is especially important in macro photography, where you often need to get very close to the ground to photograph insects or small details. A low shooting height can also be useful in architecture or landscape photography to exaggerate perspective. The most important thing is to check the maximum angle of the tripod legs. On some tripods, the center column can also be tilted or reversed, allowing you to place the camera very close to the ground.
Weight
The last basic point to consider is weight. It really comes down to whether you are going to carry your tripod often or not. And I’m not talking about walking 500 m to shoot a long exposure by the sea, right? If you travel a lot or want to hike with it, weight will be an extremely important factor before buying. Otherwise, it will almost be a detail, and a heavier tripod will often be more stable. Which brings me to the next point: keep in mind that a tripod that is too light will not necessarily be stable.
Type of materials
There are basically two main materials: aluminum and carbon. Here’s what you need to keep in mind:
- Aluminum is the most commonly used material for tripods. It remains a good compromise between stability, weight, and price,
- Carbon tripods have a stronger reputation. They are lighter, more stable, and better at absorbing vibrations. On the other hand, prices can sometimes be twice as high for the same model in carbon.
Is the extra cost worth it? That depends on your needs and your budget!
Other essential elements to consider for a tripod
Tripod legs
During your research, you may have noticed tripods with connected legs. Avoid them completely. Sure, they aren’t expensive, but they will seriously limit what you can do. In most situations, you will need to extend or shorten one leg more than another, which is impossible with this type of tripod.
Locking system
There are essentially two locking systems: twist locks and flip locks. Here, I would say it is really a matter of personal preference. Everyone has their own habits. I personally use a twist-lock system. The flip-lock system is very easy to use: you lift the lever, extend the leg, and press it back down to lock it. Many major brands use this system. The twist-lock system is also very fast in my opinion, since you only need to loosen it slightly and the section slides out automatically. Then you simply tighten it again. I would recommend going to a store and testing both systems so you can form your own opinion.
Center column
This is the column located in the center of the tripod. It can be more or less long, fixed, tilting, or reversible. In some situations, it allows you to gain quite a bit of extra height. However, be careful with wind resistance and the extra vibrations it can create when extended outdoors.
Macro photographers should pay closer attention to this system, especially its length and the possibility of reversing it, since it can allow you to position the camera much closer to the ground.


Tripod head
If you thought buying a tripod was simple, there is one more thing to consider: you need to put a tripod head on it! It is often sold as part of a kit, but not always. Of course, for you, it is essential. For photographers who are just starting out and do not want to get into more specialized gear such as panoramic heads, there are two main types of heads:
- The 3D head is a three-axis system with three controls that let you adjust the position of your shot in each direction. In my opinion, it is slower than a ball head, but still very precise. If you specialize in landscape photography and do not need to change orientation quickly, it can be a good option. Just note that it takes up a little more room in the bag,
- The ball head is a completely different system. There is usually one main knob that releases the ball. All you have to do is choose your framing and tighten the knob once you are happy with it. Some quality ball heads also have an extra knob to adjust friction, which controls the resistance of the ball when you tighten or loosen it. I think this is preferable when you need to adjust your framing quickly, for example in wildlife or sports photography.
Once again, it is a matter of preference. It is always better to test one in store before buying. Note that there are also panoramic heads, useful for capturing the scale of a landscape across several photos, and gimbal heads, which are designed for long, heavy lenses over 300 or 400 mm.

Quick-release system
The quick-release system is an accessory that is usually sold with tripod heads nowadays. The purpose of this small metal plate, which you attach under the camera using the tripod thread, is to let you quickly mount your camera body onto the tripod, as the name suggests. The same applies when removing it. Check before buying, but it is usually included.
Little extras
I’ll finish this long overview of everything you need to think about when buying a tripod with a few small extras you may find depending on the model and brand. To mention only the main ones:
- The bubble level: useful for checking whether the tripod is straight, especially in landscape or architectural photography. On the beautiful Sirui tripod heads, a bubble level is included,
- A ballast hook: located under the center column, it lets you add weight and stabilize the tripod even more,
- Retractable metal spikes (again, on some Sirui models): useful for getting better grip on smooth or slippery surfaces,
- A grip sleeve: a very practical protection when it is cold outside,
- A carrying bag: not to be overlooked, as it is not always cheap,
- The monopod option (as on my Sirui, obviously): not essential, but it can be useful. I used it on safari, for example, in the car, instead of setting up a tripod that would have been too bulky.
Points to think about: 4 important remarks
Think about how your equipment may evolve
I’ve already touched on this above, but always think about how your photography gear might evolve. I would mainly ask:
- Are you thinking of buying a heavier lens, especially a zoom or telephoto lens?
- Are you considering moving to full frame? Keep in mind that full-frame camera bodies and lenses are almost always heavier.
- Would you be interested in macro photography? This is important to know, because you will need to look closely at the leg angle and center column. I wrote this complete article to help you choose your macro lens.
This is also why I recommend checking the current maximum weight of your gear, then doubling or even tripling it to keep a comfortable margin if you are considering this kind of evolution. It would be a shame to have to change your tripod only one or two years later, right?


Are you likely to move toward something else: a big zoom on the left, a full-frame camera in the center, or macro photography on the right?
What kind of photography do you practice?
At the same time, while it seems obvious to think about how your gear may evolve, your photography practice is another very important point. If you only use a tripod near your house by the sea, 300 m from a parking lot, or if you go hiking for several hours or several days with it, the situation is completely different, isn’t it? Think about:
- What will be your main use for it?
- Are you going to walk with it? This will determine whether weight is important or not, and therefore the choice of material and budget,
- Do you travel often? This is also worth considering, as you will need to fit it into your luggage and probably limit the weight.
In short, as you can see, your type of photography practice is a very important factor when buying a tripod. If you travel, I recommend choosing a carbon tripod, light but strong, for example. I’ll talk about this below in my recommendations.
Prices
As with many other photography accessories, budget is often one of the most important factors. In general, most people agree that you should not spend less than 100 €, or even 150 €, on a tripod. This is the bare minimum. Keep in mind that if you bought a camera body + lens set for 1,000 € and the tripod falls over at the first strong gust of wind because you wanted to save a little money, you’re going to panic, aren’t you? If you can afford it, this is clearly something worth investing in.

Well-known brands
Although more and more brands now manufacture tripods, some stand out from the crowd for their quality. To mention only the main ones: Manfrotto, Gitzo, Vanguard, or Sirui.
In general, I would advise you not to stray too far from well-known brands. Each brand has different ranges or series, depending on supported weight and the materials used. If you can, I would recommend seeing a few tripods in store to get a feel for the product, the type of head, the locking system, and so on.
Which tripod should you choose? My recommendations
For those who don’t want to spend time comparing every tripod and all its features, here are a few personal recommendations.
To help you with your research, I have selected good-quality tripods that are well rated by users, with prices between 150 and 300 €.
Of course, special attention should be paid to your needs, the maximum load, the desired height, and the photographic accessories included with the tripod. The best approach is to first know what you need, then look at the models mentioned in the links above. Below, I’ll give you a few details about each brand mentioned in the article and a specific recommendation each time, to be adapted according to your needs.
Manfrotto tripods
- The 190 series: this is one of the main choices for a first serious tripod. Maximum load is between 4 and 6 kg, with prices ranging from 150 to 350 €. It is not ideal for heavy gear such as a full-frame camera + telephoto lens.
- The 290 series: this is a derivative of the 190 range, divided into three categories: Dual, Light, and Extra. It is more affordable than the 190 series and generally recommended for beginners, but below the 055 series in terms of features.
- The 055 series: this is the brand’s higher-end range, aimed at advanced amateurs and professionals. The maximum load is higher than the 190/290 ranges, around 7 to 9 kg. Prices range from 300–350 € for aluminum versions to more than 600 € for carbon versions. This is the range to choose if you want high-quality equipment. Perfect for heavy camera body + lens setups.
- The new Befree series: perfect for travelers or hikers looking for a light tripod that remains relatively stable. Be careful with the maximum load, which is around 4 kg. It is not suitable for heavy setups, such as full frame + telephoto lens, but it is a good compromise for lighter travel kits.
A very good product at a reasonable price is the Manfrotto MK055XPRO3 with the MHXPRO-BHQ2 head. It is a well-finished, stable product that supports up to 8 kg of load capacity.

Example of Manfrotto tripod – More details on Amazon
Sirui tripods
The brand has quite a large number of series. Here are the main ones:
- The T series: this is the lightest range, perfect for hikers and travelers looking for something light. The maximum load varies from 4 to 6 kg, and the maximum height is around 1.15 m, which is quite low. Prices range from 150 to 400 €, depending on the material used, the height, and the maximum load.
- The ET series: this range sits above it, with higher maximum loads between 8 and 12 kg and more or less similar maximum heights, around 1.15 to 1.25 m.
- The TX and NX series: the maximum loads are even higher, between 10 and 15 kg, as are the maximum heights, from 1.2 m to 1.6 m. These also come with four or five sections. The TX series is lighter, while the NX series is heavier.
- The W-series: here, we move into a different range, with higher maximum heights, around 1.3 to 1.4 m minimum, and maximum loads from 15 to 18 kg. Four sections provide better stability.
I personally own the excellent Sirui M3204X, in carbon. You will find all the brand’s available models on this page. Another excellent tripod I recommend is the Sirui T-2004XL, supplied with the E-20 ball head. It has a load capacity of 15 kg for a weight of only 1.67 kg.

Example of Sirui tripod – More details on Amazon
Vanguard tripods
The last very well-known tripod brand I’ll mention here is Vanguard. Here are the main ranges:
- The Alta Ca and Espodo series: these are the first entry-level series, perfect for small DSLRs and for keeping the budget reasonable. The admissible load is around 5 kg,
- The Alta Pro series: this is one of the higher ranges. Maximum load is between 4 and 6 kg, and prices are generally around 200/250 €.
- The Véo and Véo2 series: these are the ranges designed for traveling light. Admissible loads vary from 4 to 8 kg depending on the model. Prices are around 150 to 250 €. Some carbon models are very light and therefore perfect for travel.
I particularly recommend the superb VEO 2 264 CB carbon tripod, weighing only 1.6 kg for 8 kg of load capacity. A perfect travel companion.

Example of a Vanguard tripod – More details on Amazon
I’m coming to the end of this long article, and I hope it has helped you understand how to choose a photography tripod. The choice is huge, the competition is tough, and you will need to be patient and compare a few models before buying one. If you like photography, I invite you to read our tips on how to improve your travel photos! And still on the topic of travel, be sure to check out our guide to portable printers.
If you have any questions, need help, or would like clarification on the article, leave me a comment! If you liked it, feel free to share it with friends who also love photography.
See you soon,

Written by Sylvain PONS
I've been passionate about photography since 2010, learning as I went along. Today, I dedicate myself to guiding others in their choice of camera gear and sharing a variety of tips to improve their photography skills.
Despite our care, a mistake may have slipped into this article. If you find any, please don't hesitate to let us know so we can correct it as soon as possible and keep our information up-to-date!