Which camera accessories should you choose for travel?
Last update: 06/24/2026
Our blog continues to grow thanks to you, our readers. This post may contain affiliate links, which means we can earn a small commission if you make a purchase through them, at no extra cost to you. This helps us to continue to bring you more and support our work!
When you start photography, you often don’t realize how much commitment is actually involved. We all tend to think it is just about having a DSLR or mirrorless camera and a few lenses. But as we progress, we become aware that camera accessories are important, and even essential in some cases. In this article, I focus on travel photography and, more specifically, on which camera accessories to choose for travel. Are you looking for camera accessories specifically for a safari?


The purpose of this article is not to give an exhaustive list of all the camera accessories that are useful or essential for travel, but rather to give you an overview of the 10 accessories that I consider very useful when travelling.
You can then decide for yourself how useful each of these accessories might be for your own trips. Do not hesitate to leave a comment if you think I have forgotten any useful accessories for travelling! Some people also prefer to choose a tablet for travel, what do you think?
What are the essential camera accessories for travel?
1 - Filters
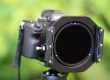
In my opinion, filters are among the main camera accessories to consider when you go on a trip. I don’t travel without them anymore! To put it simply, filters are external elements, available in different sizes and levels of quality, that screw onto the front of your lens for various reasons. The main filters are:
- The UV filter: transparent in color, it is used to protect your lens. In all honesty, I don’t use one, and I don’t think it is very useful when travelling.
- The polarizing filter: for me, this is the most essential filter, and even a necessary camera accessory when travelling. Its main uses and benefits are improving contrast and color saturation (making the sky bluer, for example) and eliminating reflections (water, glass, metal, etc.). I have been using one when travelling since the beginning and now own two of them (one for my Canon 70-300 L and one for my Canon 24-70 mm f/2.8). If you want to know more about the polarizing filter, I have written 3 articles on the subject, explaining in detail: 1 – What is the purpose of a polarizing filter? 2 – How do you choose one? 3 – How do you use a polarizer?

The polarizing filter, the must-have photo accessory when travelling! – More details on Amazon
- The ND filter (Neutral Density filter): these are more or less opaque filters, depending on the intended use. They reduce the amount of light entering the lens during shooting and are useful for shooting long exposures (waterfalls, the sea, clouds, fireworks, etc.), blurring people in photos (it really works, I promise), or shooting with a shallow depth of field in very strong light.
Personally, I chose the very popular “Big Stopper” from Lee Filters, and it never leaves my travel bag! I also own a B+W 106 (ND64) for long exposures at sunrise or sunset.
I have written a complete article that explains what an ND filter is used for in photography.
- GND (Graduated Neutral Density) filters: these use the same principle as ND filters. They are graduated filters that are more or less opaque on one part of the filter (usually the top). Their main purpose is therefore to reduce the light on one part of the image (often the brighter sky in landscape photography).
Likewise, mine never leaves my bag when travelling, and it is almost always on the camera when I am taking landscape photos. I mostly use the LEE brand, especially a GND 0.9 SE (soft edge).
2 - The tripod
If you are looking for another very useful camera accessory to take on a trip, in addition to filters, there is the tripod. It is up to you to decide whether it is worth bringing one, depending on the type of photos you want to take.
There are hundreds of options, from a €30 tripod to a €1,000 model, heavy or very light, more or less tall, more or less sturdy, and more or less resistant to wind, cold, or a specific load capacity (camera weight + lens).

In short, it is difficult to recommend a specific type of tripod without knowing what you are going to do with it, the kind of photos you want to take, your expectations, your budget, and so on. You can refer to my post on how to choose a tripod!
Nevertheless, if you want to bring a tripod when travelling, I recommend either a small Gorillapod (which I personally own), a monopod, or a lightweight tripod suited to your equipment, such as the Manfrotto MKBFRC4-BH.
I recommend a solid tripod for all lovers of long exposures and for wildlife photographers (for bird or safari photography, for example). I have personally adopted the Sirui M3204 and the K-30X head.
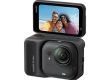
3 - A second body
Well, I agree, it is not an accessory in itself, but I strongly recommend that anyone going on a trip bring a second camera in addition to their main camera.

I have just purchased an Olympus TG-6 – More details on Amazon
In case your main camera is stolen, breaks down, or cannot be used in a more delicate situation, a small rugged compact camera will be perfect!
For my part, I use the Olympus Tough TG-6 as a second camera in addition to my DSLR, with a silicone shell (perfect for shocks). It is robust, solid, waterproof, and therefore perfect for a trip!
4 - Memory cards
I have already mentioned this subject in my article on how to back up your photos while travelling. Memory cards are indeed one of the backup options. There are hundreds of them, with different capacities, formats, and speeds. The key is choosing cards that are suited to your photography practice.
If you need to use a high burst rate with your DSLR, you can rely on a speed class 10 SD card or a speed class 10 CF card.
By the way, here is everything you need to know about choosing a memory card for your camera.

In any case, I recommend bringing at least 3 or 4 per person. The idea is not to put everything on the same card, because it can be a disaster in case of theft, loss, or a technical problem with the card.
Beyond that, I strongly recommend looking at other solutions to store your photos while travelling.
5 - Additional batteries
If you are still wondering what camera accessories to choose, extra batteries are clearly one of the things to think about!
For people using DSLRs, the minimum in my opinion would be to have two. Depending on your type of trip, you may want to bring more (for example, for a long trek over several days or weeks without electricity, or when travelling in the cold).
You should know that cold weather considerably reduces battery life, so be careful to protect your batteries properly.
I recommend batteries from official brands (e.g. for my Canon 6D) rather than third-party brands, which are not always reliable.
6 - A camera bag adapted to your photography practice
And yes, it is an accessory that you will have to buy sooner or later, especially if you shoot with a DSLR or a mirrorless camera. At first, you will probably think it is unnecessary, but as soon as you have 3 or 4 lenses (including a telezoom), a few filters, batteries, cleaning kits, and so on, you will realize that you no longer have a choice. I spent a while without one, but now it is no longer possible!
There are many different types: large or small, more or less bulky, more or less expensive, and more or less protected against impacts, sun, rain, or cold.

Example of a camera bag from the Lowepro brand – More details on Amazon
The goal is therefore to find a bag that suits you and is adapted to your camera equipment, your types of travel (cold or wet conditions, for example), and your budget.
Personally, I have adopted a bag with a special system that consists of a detachable photo compartment inside the main bag. It is very practical because it gives me a backpack for storing my camera gear, while also leaving space for everything I need during the day.
Many camera bags do not necessarily allow you to store both your photo equipment and your day-to-day items. So be sure to think carefully before you buy your camera backpack.
7 - Photo cleaning equipment
Indeed, when you are travelling, your photo equipment is bound to get dirty, and given how much it costs, it is better to be able to clean it properly! This means cleaning your photo equipment whenever needed.
From personal experience, I always clean all my equipment:
- After a photo trip to the sea (because of salt, sea spray, and seawater),
- Every evening during a photo safari (dust, sand, etc.),
- After every weekend, trip, or vacation where my camera has been used.
There are countless tools available to clean your camera. I have been using these for years:
- A cleaning pen (actually, I have two), perfect for removing dust and other small particles from the front of lenses and between the lens and the camera;
- A cloth suitable for lens cleaning, which I mainly use to clean the front element of the lens. A word of advice: given how little it costs, I recommend having two or even three. You can rotate between them, especially in dusty conditions;
- A blower bulb, which also removes dust from corners where the cleaning pen is less practical. It doesn’t take up any space, and I find it very useful.
With these three items, I am always ready to clean my camera.
8 - Protecting my photo equipment
When it comes to protecting your photo equipment, there are a few different options available. For my part, I recommend:
- A silicone camera cover (e.g. Canon 6D), perfect for protecting against knocks in general,
- Silica gel packs, you know, the little packets you find in shoe boxes? At worst, you can buy a few packs. They don’t cost much and are perfect for absorbing moisture,
- There are also lens covers that mainly protect against dust, which is very practical on safaris, for example,
- Finally, a rain cover to protect your camera and lens is worth considering if you are going to be in wet and rainy areas (check the weather conditions beforehand).
With these four items, you can effectively protect your photo equipment.
9 - Additional gadgets
I am talking about gadgets here, but these are still items worth considering depending on your passion for photography, what you plan to photograph while travelling, and your budget. I recommend four of them here:
A remote control: this will be particularly useful for:
- Shooting long exposures (waterfalls, the sea, clouds, etc.);
- Taking pictures of yourself alone or as a couple (without bothering passers-by);
- Taking pictures in difficult conditions to avoid motion blur (e.g. at night, in low light, etc.);
To put it simply, there are three different types: wired models, wireless models, and models with an intervalometer for shooting timelapses.
If you often find yourself in one of the three situations above, you should not travel without one!

My Canon remote control that I use for my long exposures – More details on Amazon
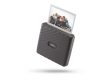
- A pocket printer, which allows you to print your photos directly on the spot while travelling. This is a very interesting way to leave a trace behind, especially in areas with little tourism, where children may be amazed by the gift!
- Optical accessories: there are many of them, and they can be useful depending on your photography practice. For macro fans, a conversion lens or extension tubes, for example; or for those who want to zoom in more, a teleconverter (x1.4 or x2);
- A flash, which I would only recommend for people who have technical knowledge of the subject and see a real use for it when travelling. In most cases, the built-in flash will do the trick for many people.
10 - A laptop
And yes, finally, very few travellers today leave without a laptop. Here again, everything will depend on your budget and your photography needs (RAW processing, for example, or not).

During my trip to South-East Asia, I personally chose an 11-inch HP Pavilion DM1 that was very good (a model that no longer exists), and it was essential for me, if only for post-processing and storing my photos.
So that’s it for this article. I hope you now have a better idea of which photo accessories to choose for a trip. Which ones do you think are essential? What accessories do you usually use when travelling?
See you soon,

Written by Sylvain PONS
I've been passionate about photography since 2010, learning as I went along. Today, I dedicate myself to guiding others in their choice of camera gear and sharing a variety of tips to improve their photography skills.
Despite our care, a mistake may have slipped into this article. If you find any, please don't hesitate to let us know so we can correct it as soon as possible and keep our information up-to-date!