


What is the purpose of a polarizing filter in photography?
Last update: 06/24/2026
Our blog continues to grow thanks to you, our readers. This post may contain affiliate links, which means we can earn a small commission if you make a purchase through them, at no extra cost to you. This helps us to continue to bring you more and support our work!
If you love photography and travel (and if you’re reading my blog, there’s a good chance you do!), you’ve probably heard of polarizing filters, right? You may even have seen their effect without realizing it. Have you ever looked at a photo and noticed the richer contrast in a blue sky, a reflection on water, maybe a landscape mirrored on the surface, or a glare on glass? A polarizing filter was probably involved. So, what is a polarizing filter used for? This article is the first in a three-part series dedicated to polarizing filters in photography. The other two will help you choose a polarizing filter and learn how to use one.


In my opinion, a polarizing filter is an essential part of your photography equipment, or photography accessories, along with a camera bag, an ND filter, and a tripod. It is especially useful for anyone learning photography, and even more so if you want to focus on digital landscape photography.
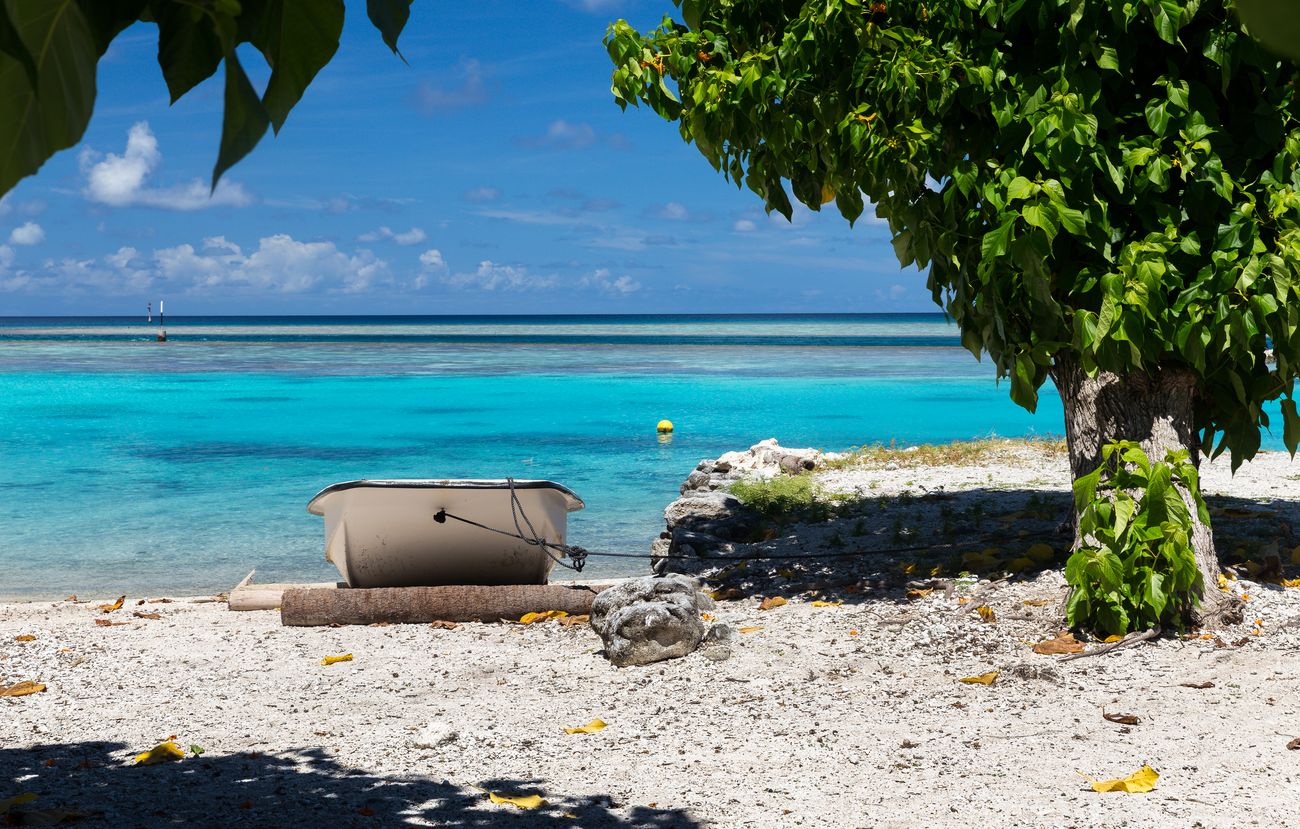
The goal of this article is to explain in detail why this filter is so useful in photography. In my opinion, every travel photography enthusiast, especially anyone interested in landscapes, should have one. Keep one very important thing in mind: the effect of a polarizing filter cannot be recreated in post-processing. That means your editing work will usually be much lighter than with a photo taken without a polarizing filter.
What is a polarizing filter?
A polarizing filter, also commonly called a “pola,” is, as the name suggests, a photographic filter placed in front of your camera lens to create specific effects while shooting. In most cases, you’ll use a circular polarizing filter (CPL). The filter changes the light in the scene you are photographing: it can darken it, remove glare, reduce reflections, and more. These filters simply screw onto the front thread of your lens, just like a UV filter. Once you’re done, you unscrew the filter, clean it with a cloth, and store it safely. Square polarizing filters also exist, but they are used with a filter holder placed in front of the camera lens.
It is worth knowing that polarizing filters are available for all lenses, whether you use Canon, Nikon, or any other lens brand (Sigma, Zeiss, Tamron, etc.). The first thing that determines your choice is the lens diameter. After that, you can look at filter quality, thickness, brand, and so on. Fortunately, adapter rings exist, so you can avoid buying several filters.
The purpose of a polarizing filter is to modify the light and its intensity before it reaches your camera lens. Of all the filters available, the polarizing filter is one of the most useful, especially in the middle of the day when natural light can be very strong.

Example of a quality Hoya HD filter, ideal for saturating colors and increasing contrast – More details on Amazon
At the bottom of this article, you’ll find links to my other articles, including a selection of different filter types and, more importantly, a complete guide explaining how to choose a polarizing filter depending on your needs. What I really want to show you today is how much using a polarizing filter can improve your photos, and hopefully convince you to give one a try for everyday photography and, of course, while traveling.
What is the purpose of a polarizing filter?
A polarizing filter has many advantages, but it also comes with a few drawbacks. It is important to understand both before you decide to buy and use one.
The benefits of a polarizing filter
In this section, I’ll go through the main advantages of using a polarizing filter. This should help you understand what a polarizing filter is for and how it can help you take better photos.
1 – Make colors pop: if I had to answer the question “what is the purpose of a polarizing filter,” the first thing I would say is that it helps colors stand out. These filters increase contrast in a scene and also saturate colors, making them appear clearer. This is especially visible when photographing waves, mountains, waterfalls, wide skies, and similar scenes. Reflections in a photo are either enhanced or reduced, and the colors gain more impact. The saturation of the scene can make the blue of a sky or lagoon more intense, or bring out the green in tree leaves.

In general, a polarizing filter is widely used to make skies bluer and increase contrast, depth, and volume in the sky.
2 – Remove reflections: this is the second major benefit of using a polarizing filter, which is why it is sometimes described as an anti-reflection filter. Personally, this was one of the main reasons I bought my two filters. So, what reflections are we talking about here?
To remove or reduce reflections on water: this is the most obvious effect, and you can see it clearly when you adjust, or rotate, the filter. Depending on the time of day, and especially in bright daylight, landscape scenes that include water are particularly prone to reflections. Whether on rivers, the sea, or ice, a polarizing filter can reduce or even eliminate reflections in a photo. Still not convinced? Look at the photos below, taken without and with a polarizing filter. Pretty striking, isn’t it?


You can see how the photo taken with the filter brings out the lagoon highlights better, and how its color stands out much more than in the photo taken without a filter, where the sun is completely reflected. Also note that the photo taken with a polarizing filter is slightly darker than the other one. These filters tend to darken the scene a little because they are slightly opaque, although they still let most of the light through. In low light, a polarizing filter tends to reduce the shutter speed, in other words, it slows it down.
The effect is especially visible in tropical areas, where reflections on turquoise water and lagoons can spoil a photo instead of capturing the beauty of the scene. Try photographing a beautiful blue lagoon without a polarizing filter, and you’ll see what I mean: your travel photos can look dull….
- Remove reflections on buildings (street photography): street photographers, and architectural photographers in particular, know very well what a polarizing filter is used for. Many of them keep one permanently attached to their lens. As with water, a polarizing filter can reduce or even completely eliminate reflections on glass buildings, glass surfaces, and metals such as steel and iron, which greatly improves the final rendering.

- Remove reflections in macro photography: another useful benefit for macro photographers is that these filters help highlight specific details in wildlife and nature photography. Just like on water (sea, rivers, lakes) or buildings, reflections can be reduced on foliage and shells. Another great advantage of a polarizing filter.
- Remove reflections in the eyes in portraits: this is another very useful and interesting reason to use a polarizing filter if you are a portrait photographer. Reflections in your subject’s eyes can be removed.
3 – Remove atmospheric haze: this may not matter much to some people, but if you are a landscape photographer, haze can make your photo look flat, with less contrast and volume. This is particularly noticeable when taking photos through windows, for example from an airplane. Those of you who have already tried it know what I mean! Reflections on the window and the haze visible at high altitude can be reduced with a polarizing filter. More generally, whenever there is even a small amount of fog or haze, in the mountains for example, a polarizer can be very useful.

4 – Help with long exposures: while this is not the primary purpose of a polarizing filter, it does absorb light, so it can be useful if you want to slow down your exposure time (for long exposure photos, for example) but don’t have an ND filter (neutral density filter) on hand. In addition to reducing reflections, the polarizing filter also allows you to expose the scene for longer thanks to its opacity.
5 – Protect your optics: this is the last advantage, in my opinion, and not necessarily the most obvious one. A polarizing filter protects your lens from dust and dirt, and can even help protect it in the event of a fall! In that sense, the filter also plays a protective role. After all, it is better to break your polarizing filter, even if it cost €100, than your lens, which probably cost around €1,000, right?
Well, I hope I’ve shown you all the advantages of using a polarizing filter. You don’t need years of professional photography experience to understand how it works. Any amateur photographer can learn to use one. It’s really quite simple!
The disadvantages of a polarizing filter
The polarizing filter also has a few disadvantages, mainly related to when and how you use it.
- Loss of brightness: it is important to note that placing a polarizing filter in front of your lens usually costs you one to two stops of light, meaning your images will be darker. I plan to discuss this further in other articles on the subject, but to put it simply, when a polarizing filter is attached to your lens, less light reaches your camera sensor, so the scene becomes slightly darker. To compensate for this loss of brightness, you’ll need to use a slower shutter speed. Basically, the less light you have, the slower your shutter speed needs to be.
This is important to keep in mind when you’re trying to get a sharp photo in low light with very little time.
- Difficult to use with a lens hood: this is one of the annoying things about using a polarizing filter. In most cases, the filter is almost, or completely, impossible to use with a lens hood. The size of the lens hood, and especially its depth, makes it difficult to handle most polarizing filters. This is definitely a problem I have when using mine.
- Vignetting at certain focal lengths: another thing to consider when using a polarizing filter is the risk of vignetting around the edges of your image while shooting. In fact, the more you use wide-angle or ultra-wide-angle lenses, the more likely you are to see vignetting on the edges of your photos. This is an important factor to keep in mind when buying your polarizing filter. I’ll come back to this point in my article explaining how to choose a polarizing filter. In most cases, the best way to avoid vignetting is to buy a slim filter.
Another thing to keep in mind when using a wide-angle lens is that brightness can vary across the scene. You won’t have this problem with longer lenses.
- Brightness variation: as explained above, when using wide-angle lenses to photograph large areas of sky, for example, you may notice that the polarization is not uniform between the center and the edges of the image. This is due to your orientation in relation to the sun and the very wide field of view of your lens.
- Cost: I’ll finish this article with this important point. Good-quality polarizing filters are not cheap, and you generally get what you pay for. In my backpack, for example, I have my Canon 24-70 mm f/2.8 lens, which has a large 82 mm diameter. The larger the diameter, the more expensive the filter will be! My advice is to think carefully before buying and make sure you don’t waste money on a low-end polarizing filter of poor quality. It is better to spend a little more and be happy with the result than to be frustrated by poor quality. Think of it as an investment.

There you have it: the main advantages and disadvantages of a polarizing filter. I hope you believe me when I say it is a very useful accessory. At the very least, you should no longer be wondering what a polarizing filter is for. In my opinion, it is one of the most essential accessories for landscape and travel photographers.
Keep one very important point in mind: you cannot reproduce the effects of a polarizing filter in post-processing! I’m deliberately not talking about how to use these filters in this article, because that is the subject of another article, where I explain how to use the filter for different photo techniques, such as shooting against the light and positioning yourself in relation to the sun. I also wrote a complete article on the camera lens filter, its usefulness, how to choose one, and how to use it. If you are new to photography and want to know more about filters in general, this is the perfect post.
Would you like to know how to choose your polarizing filter? Which one is best? Are there any good brands? I answer all these questions in a very detailed article on that exact topic!
If this article was useful to you, feel free to share it on social media!
See you soon,

Written by Sylvain PONS
I've been passionate about photography since 2010, learning as I went along. Today, I dedicate myself to guiding others in their choice of camera gear and sharing a variety of tips to improve their photography skills.
Despite our care, a mistake may have slipped into this article. If you find any, please don't hesitate to let us know so we can correct it as soon as possible and keep our information up-to-date!



I searched for polarizers for several lenses that I possess, and you assisted me in saving a significant amount of money. I can’t thank you enough for everything 🙂
Thanks 🙂